
Overhaul of WEBER #3 (The original blog was written on 2nd Sep. 2007)


Finally I have started the disassembly of the WEBER.  I was a bit nervous in front of the removed WEBER, some goods for the overhaul (I got them at 100Yen store and DIY hardware store) and my treasury genuine workshop manual.  At first I started to disassemble the WEBER for #3 and #4 cylinders, which seemed to be bad condition because of the sticking acceleration pump.


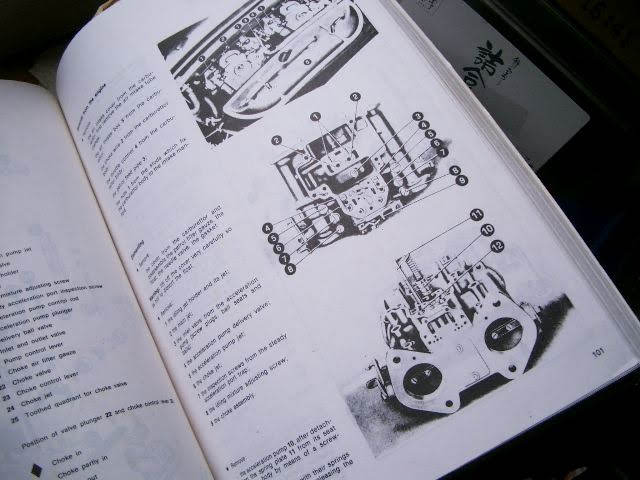
According to the instruction in the workshop manual, I removed the top cover, idling jets, main jets, inlet valves and acceleration pump retainer valve.  


So far there was no problem.  However, the acceleration pump jet was sticking.  I couldnt remove it… I decided to do it later.  I removed the choke jets, inspection screws, idling mixture screws and choke systems.  Finally I came to the sticking acceleration pump.  I removed the spring plate and pulled the pump….…but the sticking pump didnt move!!!


I gave up today.  Next time I would like to try a chemical solvent that saw several articles on the web.  If somebody knows other good solution, please let me know.

The numbers of the removed jets were as follows.  (   ) is the numbers of the WEBER 40 DCOE 4 in the service manual.
- Idling Jet: 50 F8 (50
- Main Jet: 135 F9 (127
- Choke Jet: 65 F5 (65
- Accel. pump Jet: Unknown (35

By the way, my WEBER was so dirty that I was very embarrassed!  I thought I should wash them in kerosene.

If someone knows a good way, please let me know.

Comments

Popular posts from this blog

Clutch master cylinder overhaul #3

I was still struggling with the sticking piston of the clutch master cylinder. I thought I should give up and look for the new part for the replacement.  And to for my curiosity , I started to destroy and disassemble the clutch master cylinder piston by drilling. When I was drilling the piston halfway , I didn ’ t have any specific idea , however , I thought to tap the piston to make the thread.  I started to turn the tap handle , and I felt the feeling that the piston was moved.  So , I tried to pull it , and then suddenly the piston was removed from the cylinder. Finally I could extract the rusty piston! I observed the extracted piston.  It looked there was no risk of the leakage of the fluid because the hole I made in the piston was not penetrated.  Thinking the function that this part only holding the rod connected with the clutch pedal , it could be reused if the hole would be filled by the hard material. However , before repairing the holed

Clutch master cylinder overhaul #4

The overhaul of the clutch master cylinder , which I succeeded in the removal and repair of the piston with solder ( probably ), has been still continuing.  The master cylinder was disassembled and all parts were cleaned.  The condition of each part was not bad. In the last week the cylinder and rod were painted. Assembly started.  I checked the condition of the rubber parts originally used comparing with ones of the repair kit.  And I decided to use the original ones because the rubber was not deteriorated yet and the quality looked better than the repair kit ’ s one. Always the assembly is fast although I always struggled with the disassembly. Before After The overhauled master cylinder could be operated smoothly.  And I believe the appearance also became cleaner. ( My original blog was written on 26th Jul. 2009 )